What is digital storytelling? Well, digital storytelling is a project based activity that combines writing, audio, and pictures into a digital story. When students use their own pictures and record their own audio to tell their story, it becomes very personal and students are completely engaged in the learning process. It can be done with personal narratives, persuasive/opinion writing, fiction, etc., as well as writing in other subject areas.
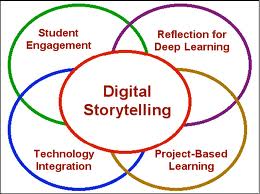
A great way to tell a digital story is through the use of Google Presentations This can be done as an individual or group project. For group projects, the teacher can set up a Google presentation with several slides and then "share" it with the group members (for individual projects, either the teacher or the student can start the presentation and "share" it with each other). Make sure that you give the students "editing" privileges when sharing. Then, each group member can contribute to the presentation by adding audio, pictures, and text. You can even have a Google folder full of pictures that the students have taken that can be shared with your students (if they have their own Google account). All students can then access the pictures for the presentations. Students can even use digital cameras to take their own pictures or find pictures online. You can also use video clips in the digital stories.
At this time, Google Presentations does not have the ability to import audio, but after the presentation is completed, you can record it using screen capture software. My favorite free one is Screencast-o-matic. This allows the students to create a video with audio of their presentation.
Other free software ideas for digital stories include Microsoft Photo Story, Windows Movie Maker, Google Picasa, and Little Bird Tales.

Students can record their voice and save their audio files to import into their digital stories. A couple of great free audio recorders are Vocaroo or Audacity. There are so many options to creating a digital story.
Here's an example of a storyboard template that could be used for each slide/page of the presentation:
Digital storytelling helps bring together many 21st century skills that students will need including: research, writing, organization, technology, presentation, interpersonal, intrapersonal, problem-solving, and assessment skills.
When all of the projects are completed, you can post them on a class website. What a great way to share what students are doing in the classroom with their families.
Happy Storytelling!
At this time, Google Presentations does not have the ability to import audio, but after the presentation is completed, you can record it using screen capture software. My favorite free one is Screencast-o-matic. This allows the students to create a video with audio of their presentation.
Other free software ideas for digital stories include Microsoft Photo Story, Windows Movie Maker, Google Picasa, and Little Bird Tales.


Students can record their voice and save their audio files to import into their digital stories. A couple of great free audio recorders are Vocaroo or Audacity. There are so many options to creating a digital story.
Here's an example of a storyboard template that could be used for each slide/page of the presentation:
Storyboard
Digital storytelling helps bring together many 21st century skills that students will need including: research, writing, organization, technology, presentation, interpersonal, intrapersonal, problem-solving, and assessment skills.
When all of the projects are completed, you can post them on a class website. What a great way to share what students are doing in the classroom with their families.
Happy Storytelling!
Comments
Post a Comment